
Windows Guide
ProShot
“There is one thing the photograph must contain, the humanity of the moment”
Table of Contents
Intro
ProShot is a rich and powerful camera app filled with features, modes and more. It may seem overwhelming at first, but it is actually easy to master! This guide will teach you how to get the most out of ProShot, and share tips along the way. It assumes no prior photography or filmmaking experience, and can be read by users of all skill levels.
Viewfinder
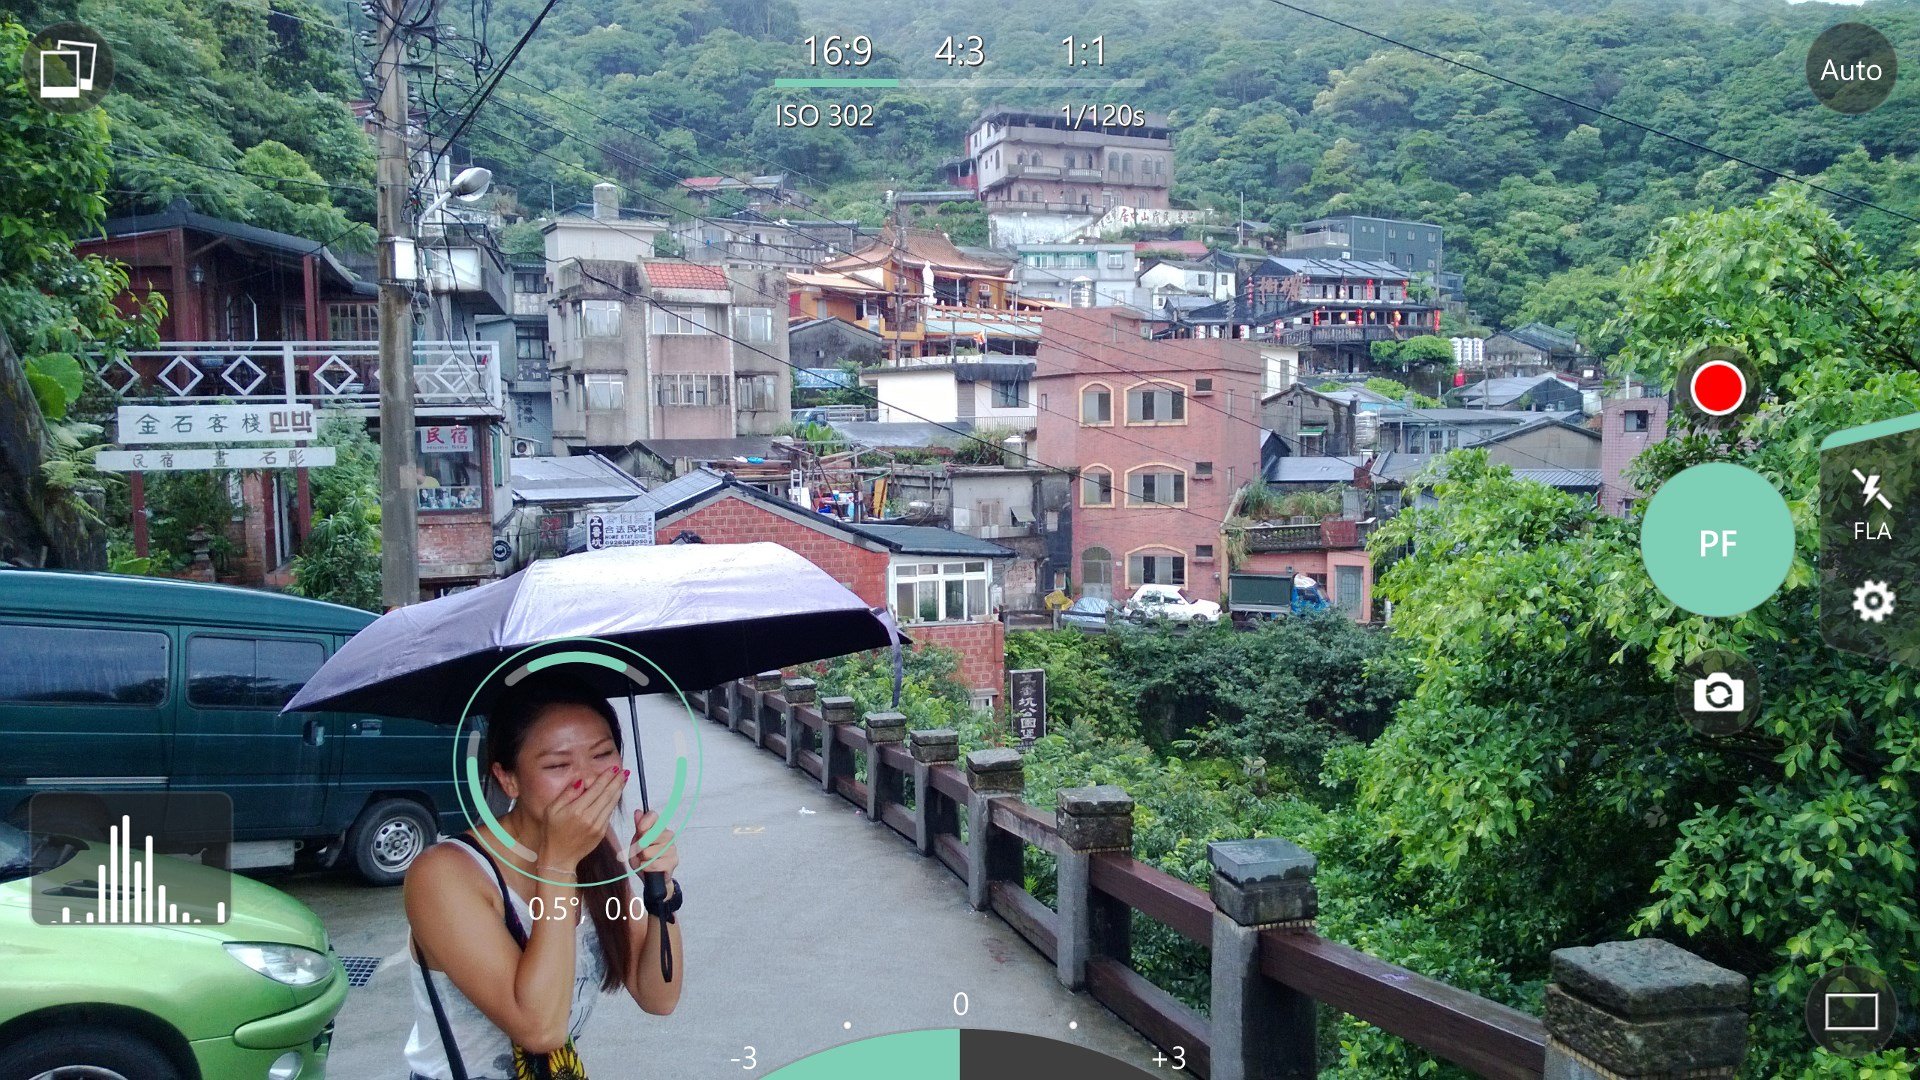
The viewfinder is where the camera feed is shown. Here you can preview your scene, select focus and exposure points, and view realtime camera info such as the histogram.
Focus and exposure
To set the focus and exposure point, tap anywhere on the viewfinder. To reposition the point, drag the box anywhere you like. To reset, tap the box.
Zoom
To zoom, simply drag one finger up and down on the viewfinder.
Manual Focus
To activate manual focus, slide your finger along the semi-transparent arc next to the camera button. Pull the arc towards the center of the screen to activate manual focus assist.
The Top Bar contains controls for aspect ratio, and shows realtime camera ISO and shutter speed values.
Top Bar
The Bottom Dial controls exposure compensation (brightness). Drag your finger left and right to adjust.
Bottom Dial
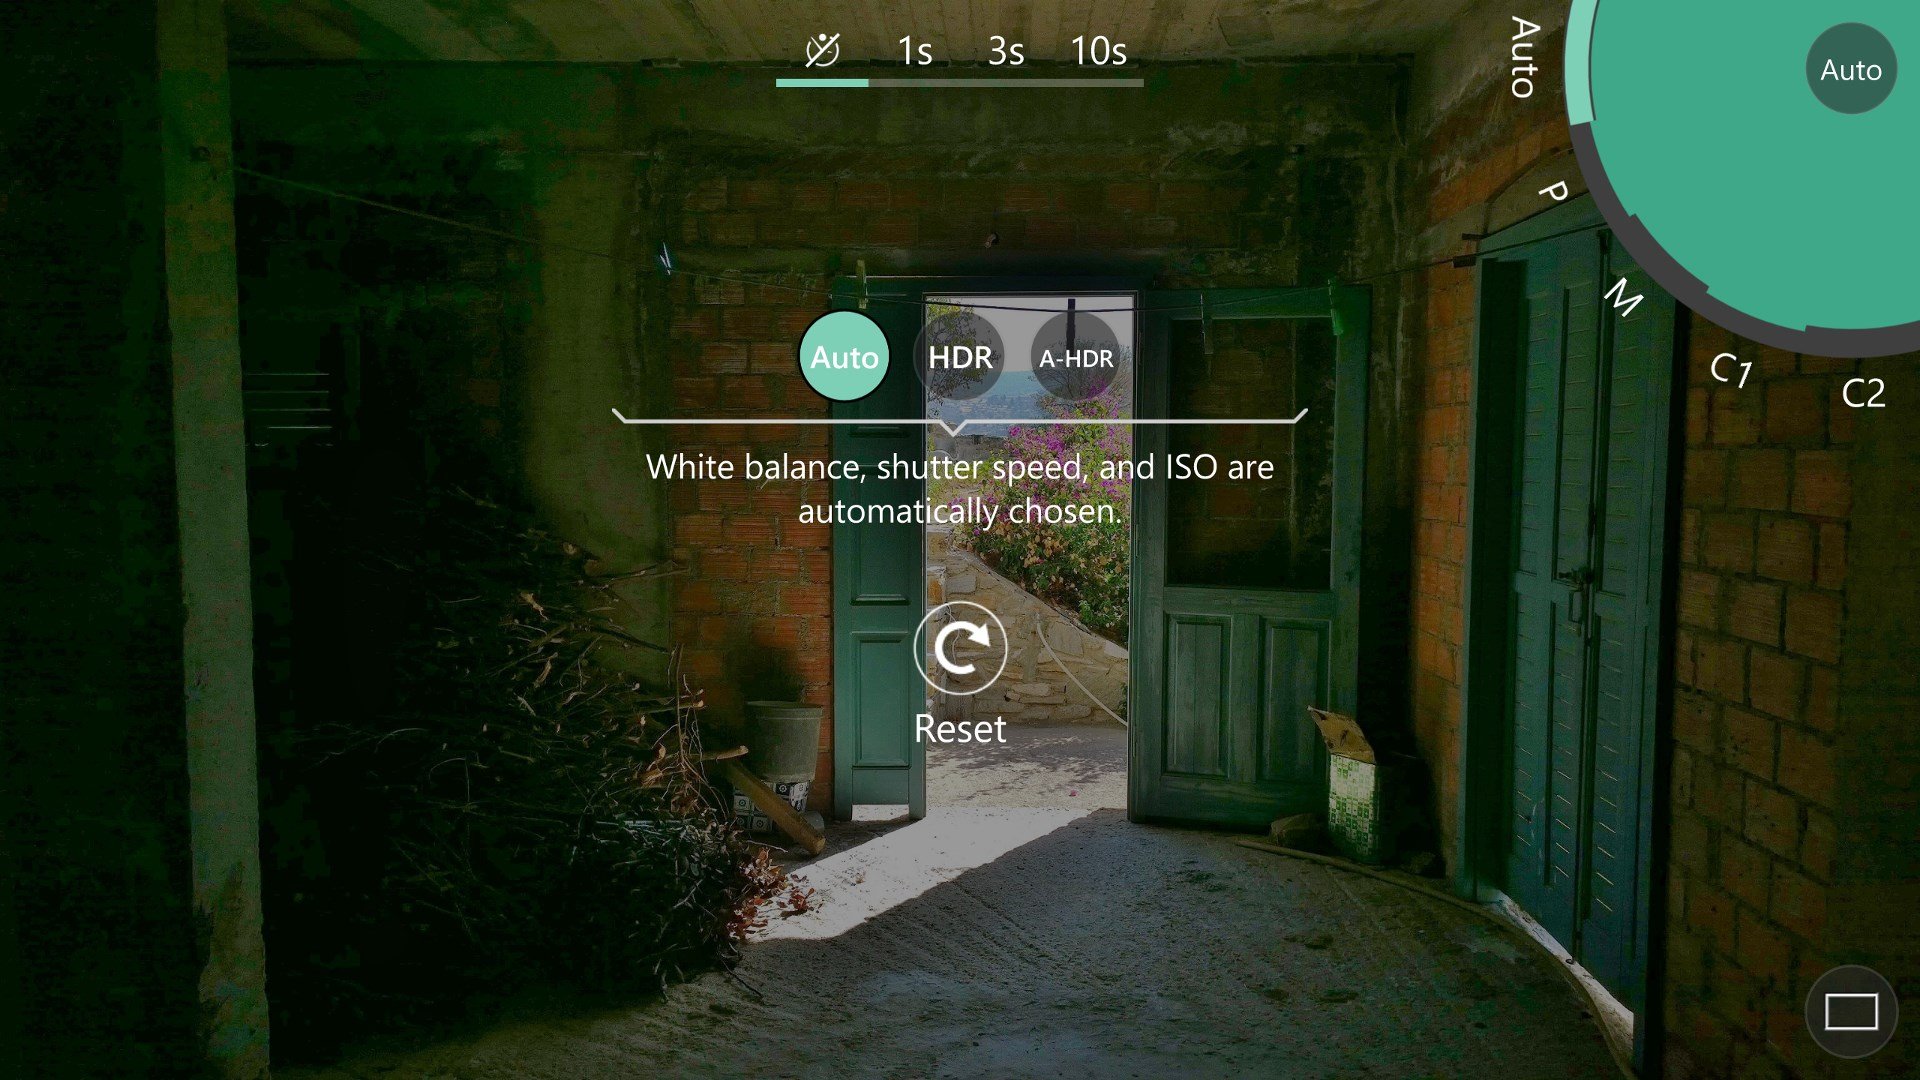
Camera Dial
The Camera Dial is modeled after a traditional DSLR mode dial and was the inspiration for ProShot’s UI. This allows you to quickly toggle between camera modes, including Auto, Program, Manual and two Custom Modes.
Auto Mode
Use this mode to capture great results in any situation, without needing to configure anything.
Program Mode
This semi-automatic mode allows you to set ISO and White Balance, while ProShot handles shutter speed adjustments. Use this when you want to keep ISO low for crisp photos, and don’t want to worry about full manual control.
Manual Mode
Use this mode when you wish to set ISO and Shutter Speed manually.
Custom Modes
Custom modes C1 and C2 allow you to save and recall your favorite camera settings. WB, ISO and Shutter Speed will be automatically saved when you make a change in one of these modes.
The Drive Dial is used to switch between ProShot’s drive modes, including Photo, Video, Light Painting and Timelapse.
Photo
Use this mode to take pictures. From the Photo menu you can enable EV bracketing.
Video
Configure your video options here. Select video size, frame rate and quality.
Light Painting
This is a special mode that allows you to paint with light. A tripod is highly recommended.
Timelapse
This is ProShot’s timelapse mode. It includes an intervalometer with adjustments for timelapse duration and interval.
Drive Dial
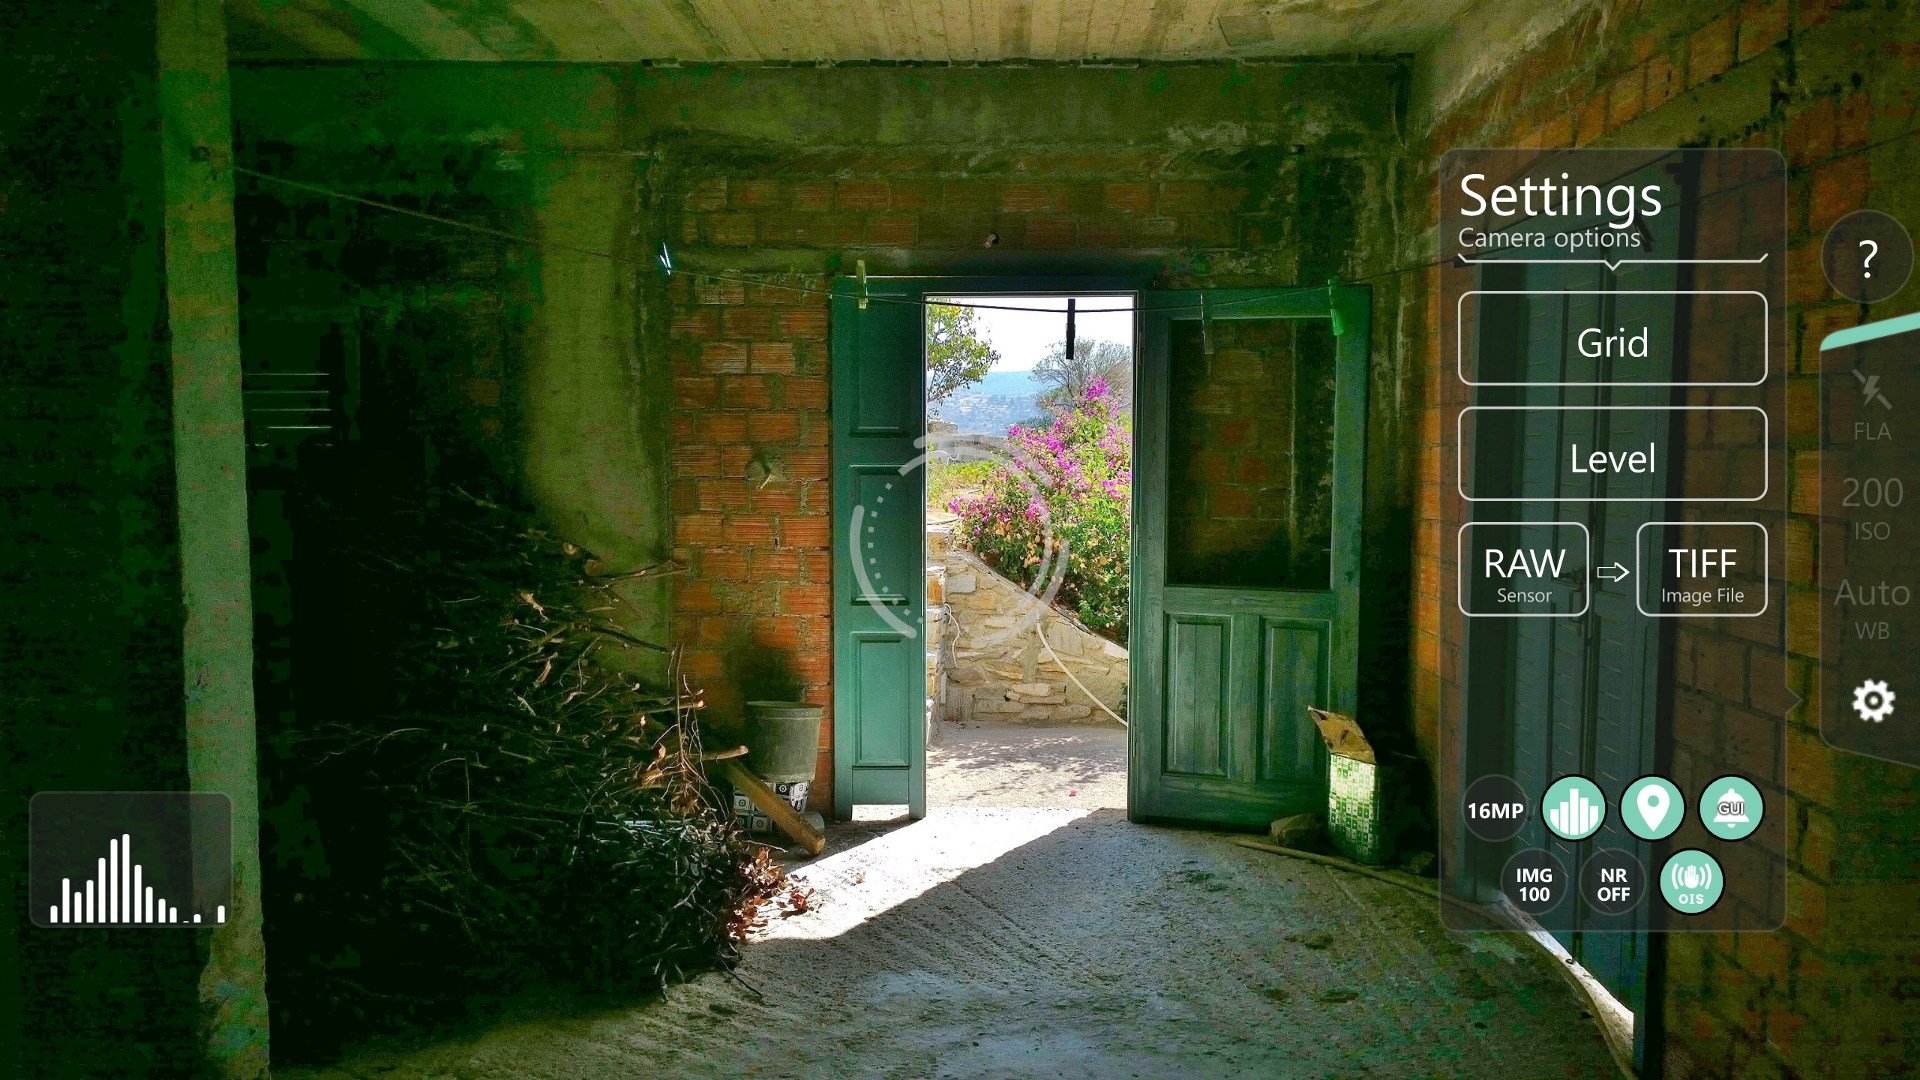
Settings
This panel offers quick access to many of ProShot’s features.
Grid
Enable grid overlay
Level
Enable horizon level
Histogram
Enable Histogram
OIS
Toggle OIS
GUI
Toggle UI sounds
IMG
Set JPEG quality
NR
Toggle Noise Reduction